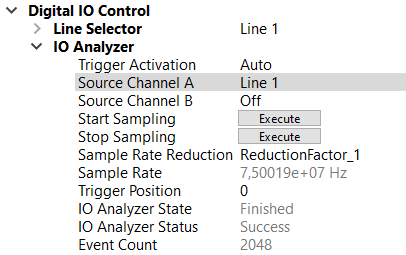
The IO Analyzer allows you to sample the IO input signal of the camera. In a case where you have problems with the input signal, for example with the frame trigger, you can use the IO Analyzer to scan the signals.
Setup and scan the IO Analyzer
| |
| |
|  |
|
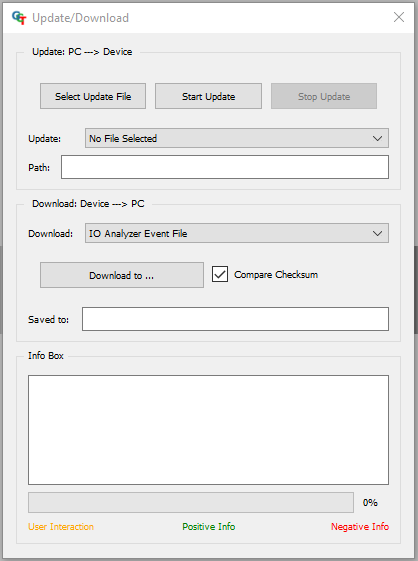
Read out the IO Analyzer data
The data of the IO Analyzer are stored in the camera and can be read out via the Up/Download dialog.
| |
|  |
|
Analyze the IO Analyzer data
The output of the IO Analyzer is a CSV file. You can either read in Excel or you can use the following Python script.
The Output of the Python script is a Plot with the signals and the calculated mean frequency.
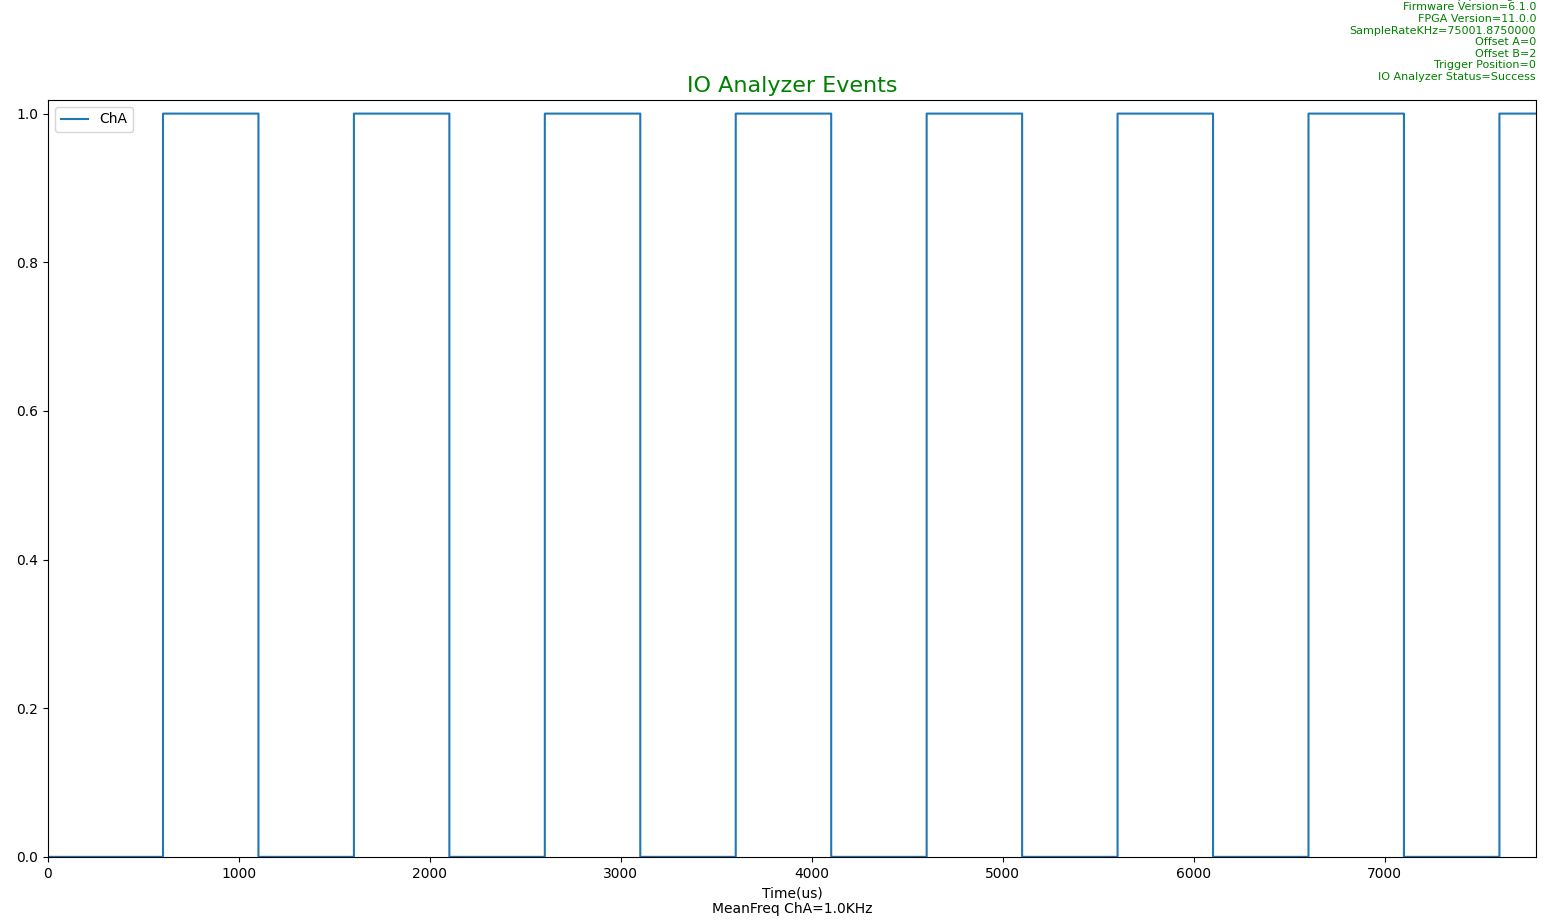 Output of the Python script
DisplayIOAnalyzerEvent.py -f YOUR_PATH\pathLog.csv

DisplayIOAnalyzerEvent.py -h
usage: DisplayIOAnalyzerEvent.py [-h] [-f F] [-s S] [-e E]

optional arguments:
  -h, --help  show this help message and exit
  -f F        -f This is the path to the io analyzer event file to display(Mandatory)
  -s S        -s This is the start time of the plot in us(Optional)
  -e E        -e This is the end time of the plot in us(Optional)