Set network adapter parameter
Automatic setting of the parameters
Note
This configuration of your GigE network adapters is done during the installation of GCT. You will also need it if you want to remove the Kithara TL.
You can run this script if you use a network adapter with an Intel chipset.
In the Public folder of GCT installation, a configuration script is also stored.
For the configuration please:
1. Turn on your camera and connect it to the PC. | |
2. Open the Windows command line in the Administrator mode, therefore press Start and type CMD into the search box. Now you can open the CMD in the Administrator mode. | |
3. Copy the following command into the CMD and press enter. | cd C:\Users\Public\Documents\Chromasens\GCT2 |
4. Copy the following command into the CMD and press enter. | runConfig10GigE.bat |
5. The command line window lists all available ethernet adapters and you can configure the network adapter by entering a Y into the script. Note If an error occurs during the execution of the script you have to configure the network adapter manually. |
|
6. After the configuration of the network parameter, the script can help you to set a static IP Address of the network adapter. We recommend disagreeing by entering N into the window. If you want to set a static IP Address for your network, you can answer with Y. |

Manual setting of the parameters
In contrast to the section above, this section is now oriented to the network adapters, which are not supported by Intel, or the operating system is Win7 x64. The setup depends on the adapter manufacturer.
1. Navigate to Windows Settings and click Network & Internet. |
|
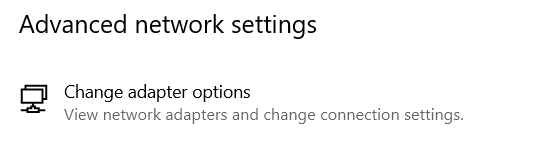
2. Click Change adapter options. |
|
3. Right-click the Ethernet adapter that will be used to connect the camera, and then click Properties. | |
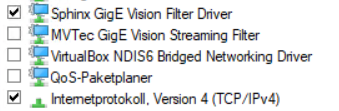
4. In the network tab only enable Sphinx GigE Filter Driver and Internet Protocol version 4 (TCP/IPv4). |
|
4. Click Configure, and then click the Advanced tab. The available parameters may vary and are depending on the adapter. | |
5. Set the following parameter. |

For HP or X710 network adapter
Attribute name (English) | Attribute name (German) | Value |
|---|---|---|
Interrupt Moderation | Interrupt-Drosselung | Enabled |
Jumbo packet | Jumbo Packet | 9014 Byte |
Large-Send-Offload V2(IPv4) | Large-Send-Offload V2(IPv4) | Enabled |
Large-Send-Offload V2(IPv6) | Large-Send-Offload V2(IPv6) | Enabled |
Direct Cache Access | Direct Cache Access | Enabled |
Receive Buffers | Empfangsbuffer | Max (e.g. 4096) |
Flow control | Flusssteuerung | Disabled |
Interrupt Moderation Rate | Interrupt-Drosselungsrate | Adaptive |
Low Latency Interrupts | Low Latency Interrupts(LLIs) | Disabled |
Transmit Buffers | Übertragungspuffer | Max (e.g.16384) |
Rx and Tx from Offloading Options | Rx und Tx von Offload-Optionen | Enabled |
Receive Side Scaling | RSS (Empfangsseitige Skalierung) | Enabled |
RSS queues | RSS-Warteschlangen | 2 |
Log Link State Event | Verbindungsereignis protokollieren | disabled |
For Broadcom network adapter
| Attribute name | Value |
|---|---|
| Energy Efficient Ethernet | disabled |
| Flow Control | Rx and Tx enabled |
| Forward Error Correction | disabled |
| Interrupt Moderation | enabled |
| Interrupt Moderation Configuration | Medium |
| Jumbo Packet | 9174 Byte |
| Large-Send-Offload V2 (IPv4) | enabled |
| Large-Send-Offload V2 (IPv6) | enabled |
| Locally Administered Address | Not present |
| Maximum Number of MSI-X Messages | Not present |
| Maximum Number of RSS Processors | Not present |
| Maximum Number of RSS Queues | 16 |
| Maximum RSS Processor Number | Not present |
| NetworkDirect Functionality | enabled |
| NetworkDirect Technology | RoCEv2 |
| Preffered Numa Node | Not present |
| Priority & VLAN | Priority & VLAN disabled |
| Quality of Service | Enabled |
| Receive Buffers (0= Auto) | 0 |
| Receive Side Scaling | enabled |
| Recv Segment Coalescing IPv4 | disabled |
| Recv Segment Coalescing IPv6 | disabled |
| RoCE MTU | 1024 |
| RSS Base Processor Group | Not present |
| RSS Base Processor Number | Not present |
| RSS Load Balancing Profile | Not present |
| RSS Max Processor Group | Not present |
| Speed & Duplex | 10 Gbit/s Full Duplex |
| TCP/UDP Checksum Offload IPv4 | Rx and Tx enabled |
| TCP/UDP Checksum Offload IPv6 | Rx and Tx enabled |
| Transmit Buffers (0= Auto) | 0 |
| Virtual Machine Queues | enabled |
| VLAN ID | 0 |
Set IP address
To connect GCT to the camera, you may need to adjust the properties of the network adapter. There are basically three methods to configure the IP address and subnet mask of your PC and camera:
Use LLA (link-local address) autoconfiguration, this is by default always enabled.
Use a DHCP server to configure the network settings of the PC and camera, in the default factory setting it is enabled.
Use manually assigned persistent IP addresses and subnet masks for the camera and network adapter, in the default factory setting it is disabled.
In typical installations, the camera is connected directly to the network adapter of the PC with the DHCP server configuration.
Set the camera IP address with GCT
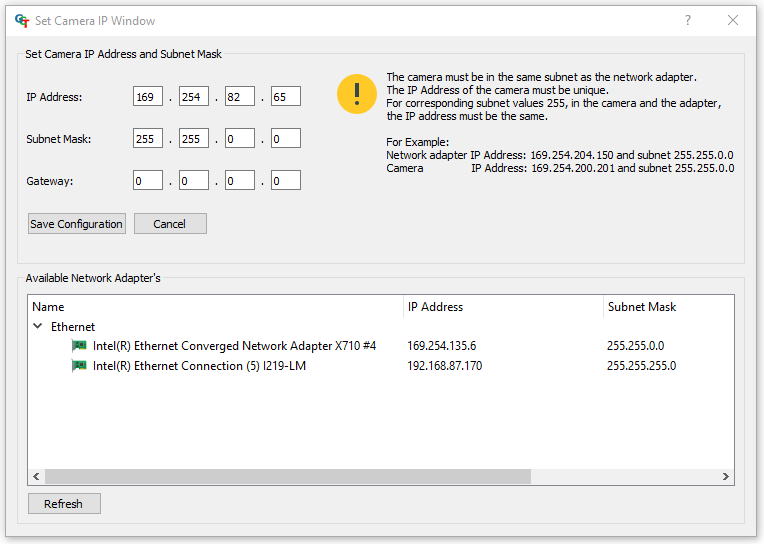
If the camera does not show up in the GCT discovery window you can set the IP-Address in GCT.
1. Start Device Discovery in GCT. | |
2. Enable the Ignore Subnet check box. |
|
3. Click the Set Camera IP button | |
4. Select the network adapter the camera is connected. |
|
5. ClickSave Configuration |

DHCP server configuration
The DHCP server configuration tries to assign different IP addresses from the Link-Local-Block (169.254.x.x) to both the camera and network adapter automatically and set the subnet mask of both devices to 255.255.0.0.
Configure the DHCP Mode in the Camera:
1. Switch On and connect the camera with GCT. | |
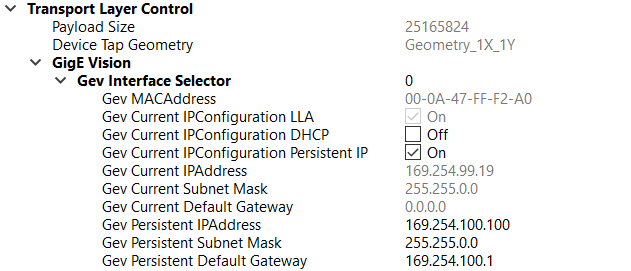
2. In the Camera Feature tab navigate to --> Transport Layer Control --> GigE Vision --> Gev Interface Selector. 3. Switch the Gev Current IPConfiguration DCHP --> On. 4. Switch the Gev Current IPConfiguration Persistent IP --> Off. |
|

Configure the DHCP Mode in the Network adapter:
1. Navigate to Windows Settings and click Network & Internet. |
|
2. Click Change adapter options. |
|
3. Right-click the Ethernet adapter that will be used to connect the camera, and then click Properties. | |
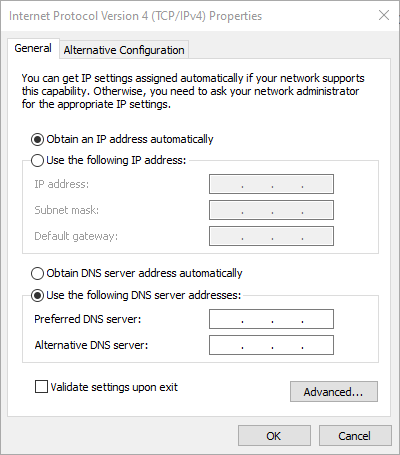
4. On the Networking tab select the Internet Protocol Version 4 item and then click Properties. |
|
|
|

Persistent IP adress configuration
The persistent IP address implies that the feature Current IP Configuration Persistent IP is switched on in the camera.
Configure the Persistent IP Mode in the Camera:
| |
|
|
Configure the Persistent IP Mode in the Network adapter:
1. Navigate to Windows Settings and click Network & Internet. |
|
2. Click Change adapter options. |
|
3. Right-click the Ethernet adapter that will be used to connect the camera, and then click Properties. | |
4. On the Networking tab select the Internet Protocol Version 4 item and then click Properties. |
|
Note For Kithara use a static IP address in the range of 169.254.X.X (169.254.1.202 using a subnet mask of 255.255.0.0) |