Kithara real-time can provide fast image capturing with the GigE Vision standard and can achieve high performance. Running Kithara real-time requires dedicated CPU cores. On those reserved cores, the real-time system is booted, which, from here on, functions just like a separate RTOS while Windows retains its full operability on the remaining CPU cores. From this point on, Windows and the real-time system run simultaneously and parallel to each other on the same computer, without one restricting the other.
The Kithara transport layer enables communication with GigE cameras based on the Kithara software.
General Kithara Informations
Requirements
| Description | Value |
| System logic cores | up to 48 cores |
| Computer memory | up to 125 GB RAM |
| Maximum usage of dedicated CPU's | 8 ( one CPU per link) |
| Maximum usage of network ports | 8
|
| Number of Dongles per system | One per system, regardless of the number of connected cameras |
| IP-Adress Configuration |
|
Licensing
A valid software license including a USB dongle is required to use the Kithara transport layer. Don't hesitate to get in touch with Chromasens about the information on licensing options. The license dongle is part of the delivery for allPIXA evo DXGE cameras.
Camera connection with Kithara Transport Layer
After the configuration of Kithara, the camera connection is working with the Kithara Transport Layer. To connect the camera, proceed as follows:
- Make sure that the license USB dongle is plugged in before using the Kithara Transport Layer.
- Make sure that you configure the Kithara Transport Layer properly, see 10 GigE with Kithara transport layer.
- When you start GCT, the first step is to detect the camera. The Kithara TL can be used like any other producer.
If the Kithara transport layer file ls_tl_gev_kithara.cti has been selected in the Select TL Producer dialog box, and the file kithara_config.txt in the folder C:\Users\Public\Documents\Chromasens\GCT2 has been configured, a blue Kithara window may appear for some seconds during the first camera discovery with Kithara TL.
Setting up the Kithara Transport Layer
You can Configure the Kithara Transport Layer with the Kithara Configurator on your Desktop.
| 1. Plug in the license USB dongle before using the Kithara Transport Layer. | |
| 2. Open the Generate Config for Kithara from your desktop. | |
| 3. Read the instructions and confirm by clicking Next. | |
4. Select the adapter.
| 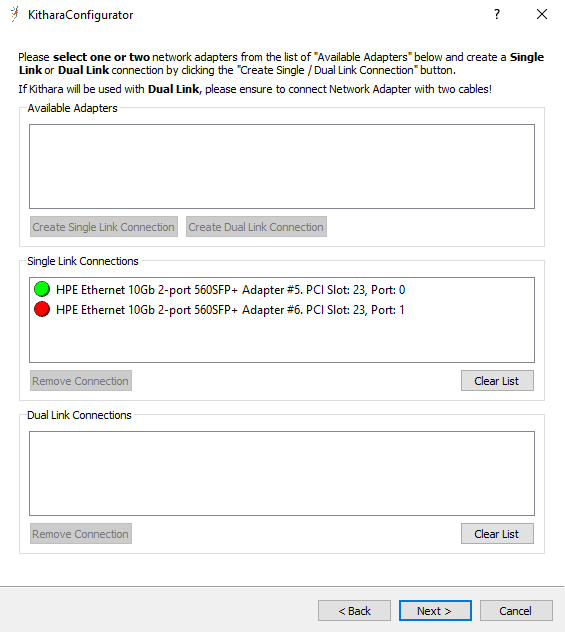 |
| 5. Click Next to confirm the configuration. |
The configurator adds a file kithara_config.txt to the folder C:\Users\Public\Documents\Chromasens\GCT2, which contains the hardware IDs of the network adapters on which Kithara will be executed. Without this file, the Kithara transport layer is not able to detect the devices in GCT. The Kithara Configurator also adds the dedicated CPU cores for Kithara and disables Hyper-Threading. The Kithara Configurator will prompt the system to reboot to update the changes.
The Kithara configuration can currently be executed once before the first use of Kithara. After Kithara has been used at least once, the configured adapter port(s) are dedicated to Kithara and cannot be used from within Windows unless the driver is set back manually. In the Windows Device Manager, the network adapters can be found in the Kithara System Device section. If the cable connection for Kithara is changed, it is required to reset the network adapter driver to the original Windows network adapter driver (so that the device can be found under Windows) and rerun the Kithara Configurator.
Resetting network adapter driver back to Windows driver
After discovering the camera with the Kithara transport layer file, the corresponding network adapter connections are assigned to the Kithara driver and can no longer be found in the list of normal network adapters in the Windows Device Manager.
As shown in the following screenshot of the Windows Device Manager, the two entries of the dual port HP network adapter (HPE Ethernet 10Gb 2-port 560SFP) are not available in the Network adapters list. Instead, they are present in the Kithara System Devices list with the name Kithara RealTime -PCI Intel 10 GbE Network Controller.

To reset a Kithara RealTime PCI network controller:
1. Open the Generate Config for Kithara from your desktop. | |
| 2. Read the instructions and confirm by clicking Next. | |
| 3. Remove the single or dual link connection from the list, therefore, select the connection and press the Remove connection button. | |
| 4. Click Next to confirm the configuration. | |
| 5. Navigate to Windows Settings and click Network & Internet. |  |
| 6. Click Change adapter options. | 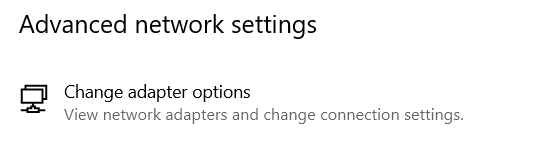 |
| 7. Right-click one of the Kithara RealTime PCI network controllers, and then click Properties. | |
| 8. Click Configure and on the next dialog box click the Drivers tab. | |
| 7. Click Update Driver. | |
| 8. Click Search driver on my PC and then click Select available drivers from a list of my PC. | |
| 9. Select the suitable adapter driver and then click Continue. | |
| 10. After the resetting of Kithara you can find the Network adapter in the Device manager under Network adapters. | 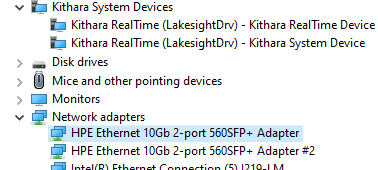 |
| 11. After the reset of the Network adapter it is required to set up the parameter of the network adapter, therefore please refer to Configure the network adapter. |
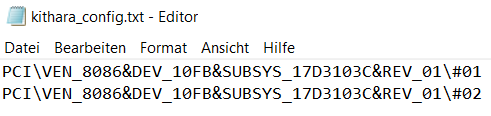
Kithara_config.txt file
The kithara_config.txt contains the hardware ID of the network adapters and the configuration whether it is a single or dual connection. The file is created by executing the Kithara Configurator. The file is stored under:
C:\Users\Public\Documents\Chromasens\GCT2
- If only a single link is used with Kithara, this file contains the hardware ID of the chosen connection as a single entry.
- If the dual link is used with Kithara, this file contains two items from the dual connections.