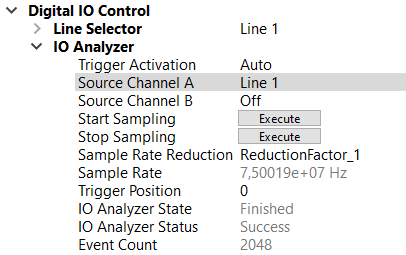
IO Analyzer 允许您对相机的 IO 输入信号进行采样。如果输入信号有问题,例如帧触发器有问题,则可以使用 IO Analyzer 扫描信号。
设置和扫描 IO 分析器
| |
| |
|  |
|
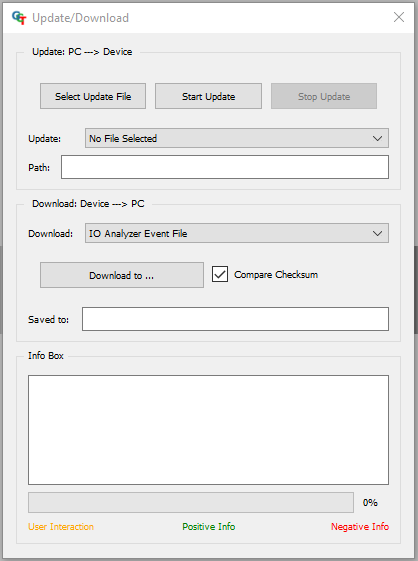
读出 IO Analyzer 数据
IO Analyzer 的数据存储在相机中,可以通过 Up/Download 对话框读出。
| |
|  |
|
分析 IO Analyzer 数据
IO 分析器的输出是一个 CSV 文件。您可以在 Excel 中读取,也可以使用以下 Python 脚本。
Python 脚本的 Output 是一个包含信号和计算的平均频率的 Plot。
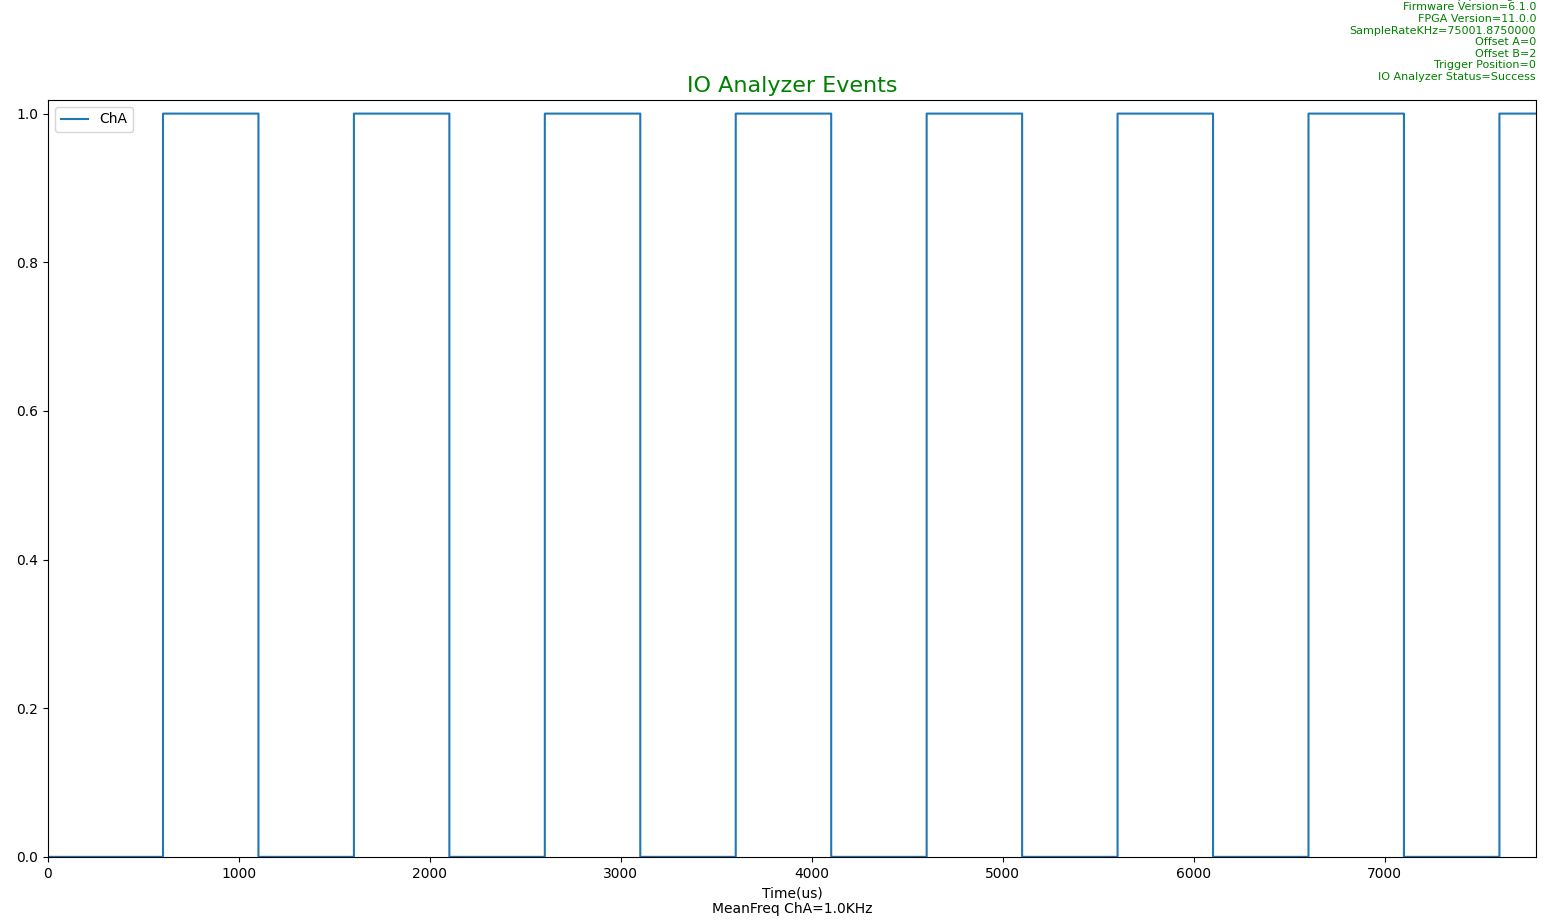 Python 脚本 的输出
DisplayIOAnalyzerEvent.py -f YOUR_PATH\pathLog.csv

DisplayIOAnalyzerEvent.py -h
usage: DisplayIOAnalyzerEvent.py [-h] [-f F] [-s S] [-e E]

optional arguments:
  -h, --help  show this help message and exit
  -f F        -f This is the path to the io analyzer event file to display(Mandatory)
  -s S        -s This is the start time of the plot in us(Optional)
  -e E        -e This is the end time of the plot in us(Optional)