Hardware - Camera / allPIXA Alignment Adapter
For setting up the Hardware, Camera, Accessories, Lens etc. you can use the Chromasens Camera Configurator on the homepage.
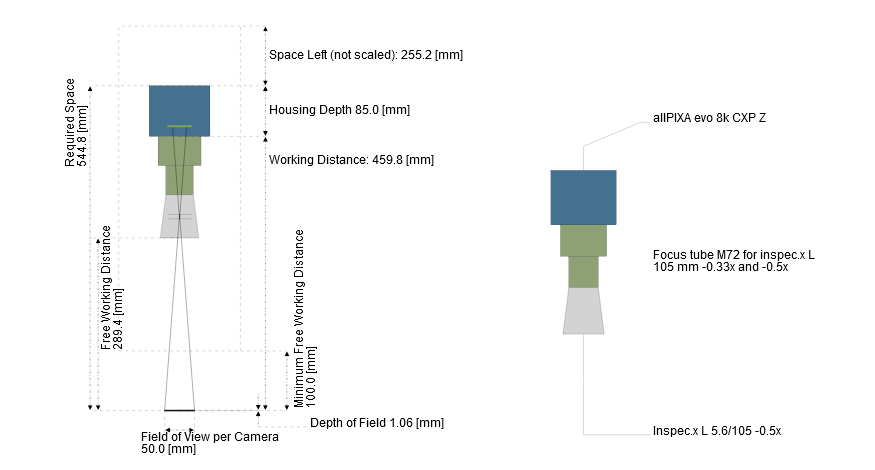
By entering the camera type and parameters used, the corresponding working distance of the camera will be displayed.
Please also check the needed accessories like distance rings, focus adjustment unit etc.
If the camera configurator does not feature the lens used, the position of the camera can be calculated classically via the lens equation.
The reference of the camera to the alignment adapter, the assembly of the camera and the degrees of freedom can obtained form the following technical drawing. Technical Drawing allPIXA Alignment Adapter.
Alignment Adapter
Check the orientation of the alignment adapter. The excentre Rot-Y, dZ and Rot-Z, should be positioned in the center, the support plates should be parallel to each other. The adapter plate is mounted using the four screws supplied.
Hardware - Illumination
For setting up the Corona II illumination, please refer to the Corona II Manual.
Software
Camera - Install GCT for Camera setup and Adjustment Tool (CST is not supporting the software adjustment tool)
For more information on how to start up the camera and CGT , please refer to allPIXA evo series Installation, or by downloading the manual for the product used from the homepage.
Illumination - Install XLC4 Commander for Corona II Illumination