The master slave mode synchronizes a master camera with several slave cameras.
The frame trigger and line trigger are only connected to the master camera. The trigger information and additional timing signals are transferred to the slave cameras via the master-slave interface. All cameras run with exactly the same timing for lines and optional frames.
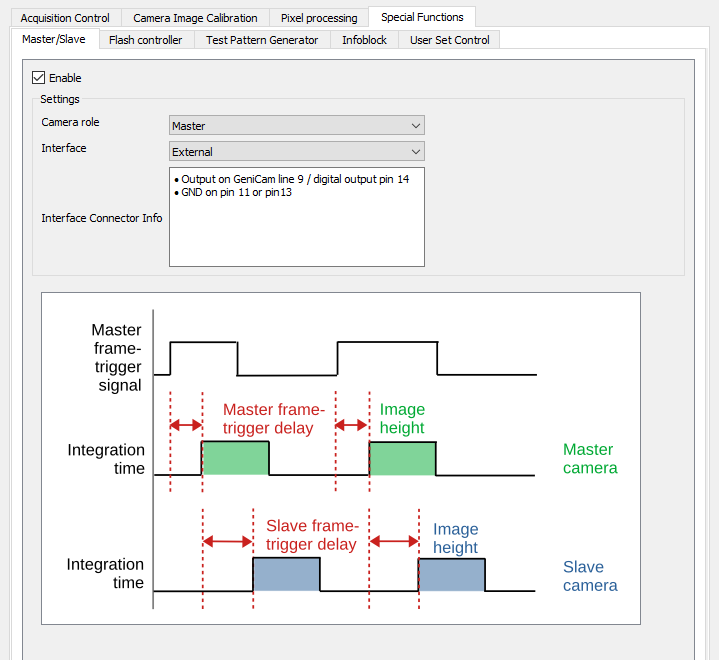
Set up the master camera
|
 |
Alternatively you can set the camera as the master camera in the camera feature tree by executing the following steps:
| Step | Feature name | Value |
|---|---|---|
| 1 | Master Slave Mode | Master |
| 2 | Master Slave Interface | External |
| 3 | Maste Slave Interface Enable | On |
Set up the slave camera
|
 |
Alternatively you can set the camera as the slave camera in the camera feature tree by executing the following steps:
| Step | Feature name | Value |
|---|---|---|
| 1 | Master Slave Mode | Slave |
| 2 | Master Slave Interface | External |
| 3 | Maste Slave Interface Enable | On |
| 4 | Master Slave Delay Lines | <number of lines for delay> |
Connect master and slave camera
The master/slave interface consists of a single timing signal for standard setup.
Use suitable Chromasens cables:
| Cable type | Order number |
|---|---|
| Master Slave Hub cable allPIXA evo (0.5 m and 1.0 m) | CP000715 |
| Trigger Cable allPIXA evo (5 m) | CP000716 |
The connection is established through the digital I/O interface.
- Connect pin 14 (line 9) of the master camera to pin 8 (line 4) of the slave camera.
- Connect pin 13 (GND) of the master camera to pin 13 (GND) of the slave camera.