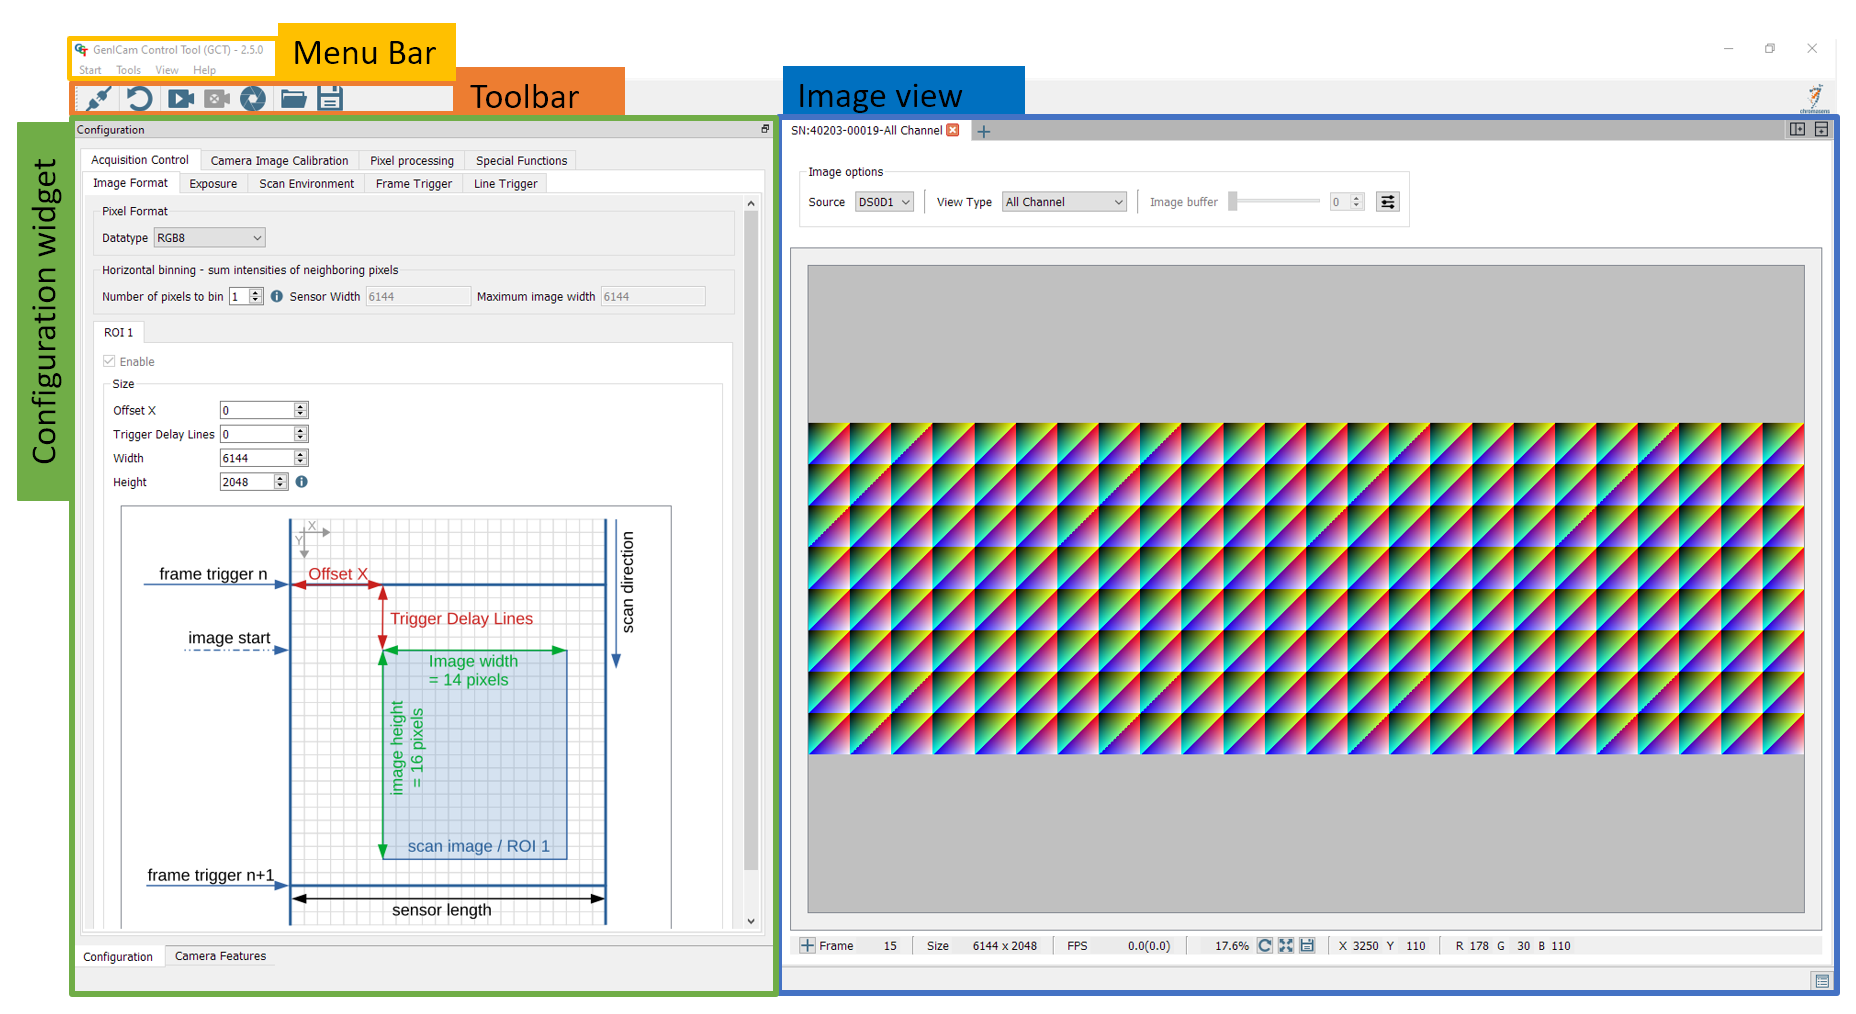
The software provides different panel elements, they can be placed, resized, and docked freely within GCT window. The GCT user interface starts after a successful connection with your camera. The window contains four main areas. The Menu bar widget is for general access, the Toolbar widget is for fast access to the most common functions, the image view widget is where the image and all relevant information are displayed, and the configuration widget is for the camera configuration.
Main window
Menu Bar
The Start Menu offers the following functions:
Connect/Disconnect: Opens device discovery widget or disconnect the camera,Connection and disconnection of Camera
Start Grabbing: Starts continues image grabbing
Device description: Load and save XML file from the camera
Settings: GCT setting options, GCT Options
Exit: Close the GCT window
The Tools Menu offers the following functions
Calibration: Opens a camera calibration dialog, Create a black-reference (DSNU) and Create a shading-reference (PRNU)
Maintenance Mode: Only for experts
Up/Download: Opens an Up/Download dialog, Up-Download
Register Editor: Only for experts
Perform Adjustment
The View Menu offers the following functions
Default view: Set the GCT view to default
Configuration Widget: Shows the configuration panel in the configuration widget
Feature Widget: Shows the Feature tree panel in the configuration widget
Image View: Shows this Image view window
Message Log: Display the Message Log under the Image view
Refresh Feature Tree: Refreshes the feature tree
The Help Menu offers the following functions
About: General Information about GCT
Open GCT Manual: Opens the GCT Manual
System Information: Generates a System information report
Search for GCT Update: Search for GCT updates
Toolbar
The Toolbar contains the following icons and their functions.
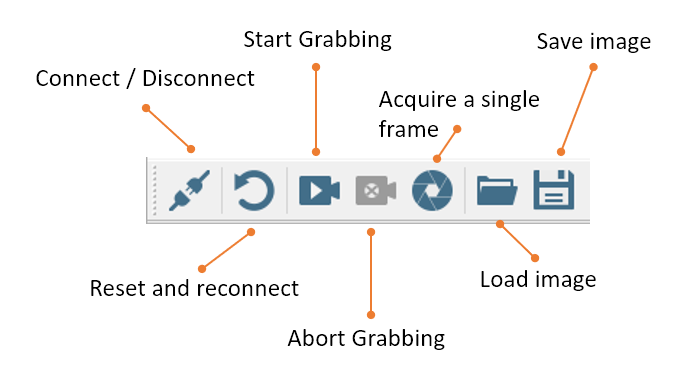
The Toolbar offers the following button functions:
Connect/Disconnect: Opens device discovery widget or disconnect the camera, Connection and disconnection of Camera
Reset and reconnect: Resets the camera and reconnect
Start Grabbing: Starts continues image grabbing
Abort Grabbing: Stops the image acquisition
Acquire a single frame: Acquires a single frame
Load image: Load an image from the disk
Save image: Save image to disk
Configuration widget
The Configuration widget provides two panels, Camera features which is the GenIcam parameter tree, and the configuration panel which is a graphical representation of the GenIcam parameter tree.
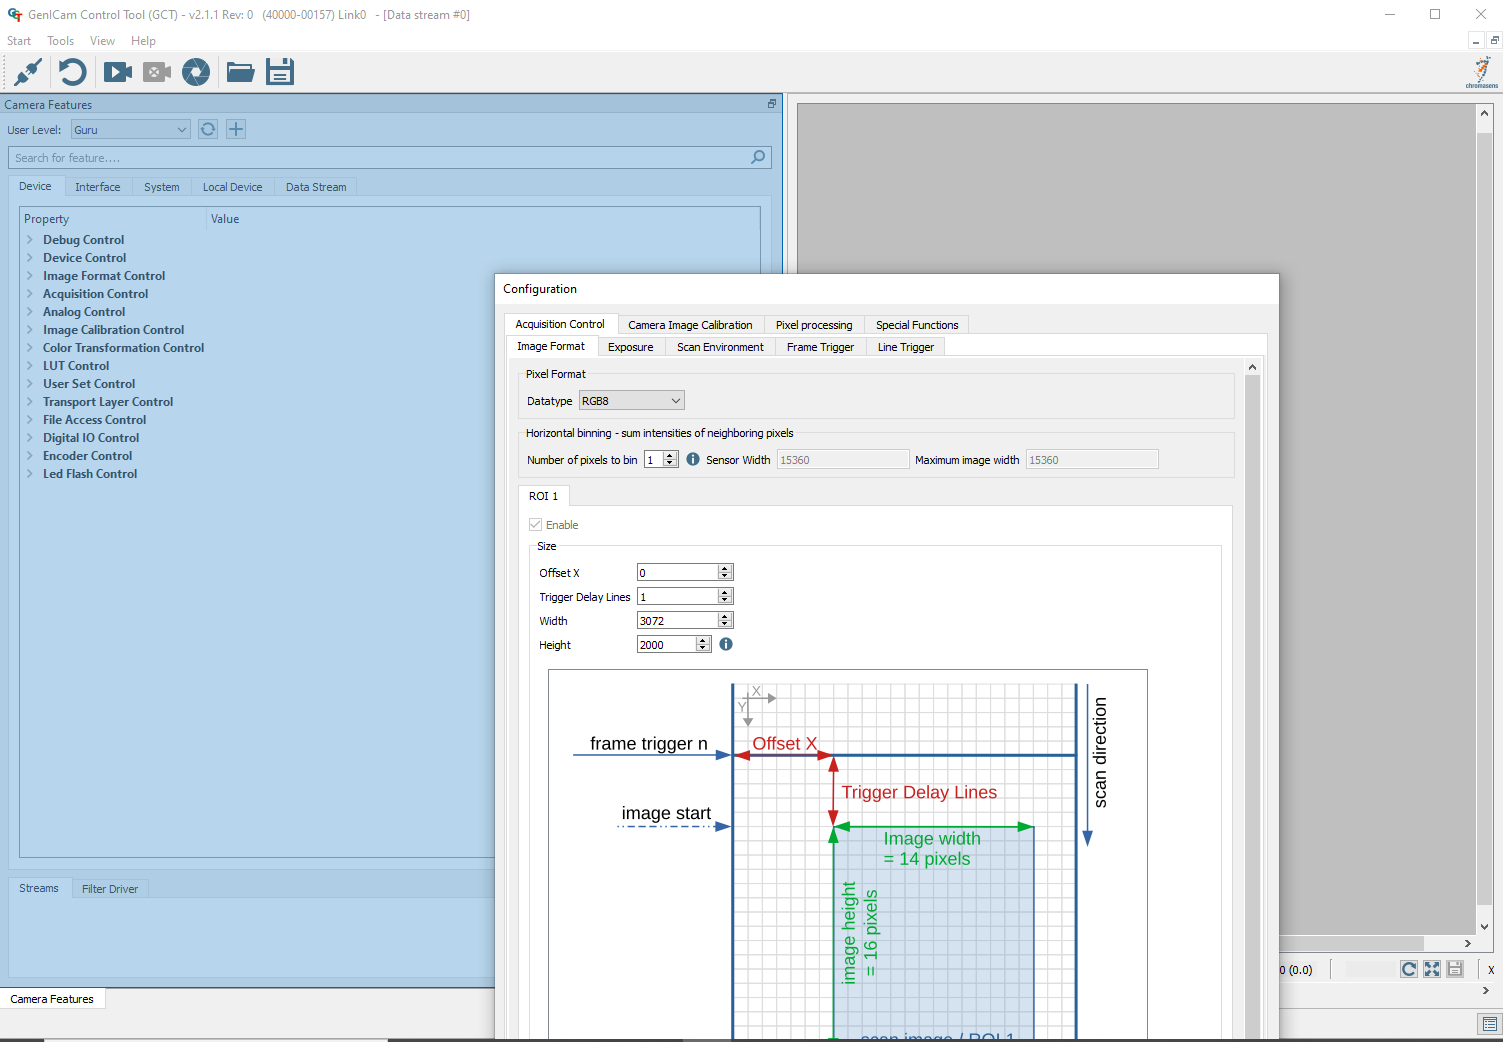
The following image shows the configuration panel of the configuration widget. The panel contains a tab view, from which four main categories can be selected. Each tab contains another tab view with subcategories. The content in each sub-tab view is scrollable.
An Info box or tooltip is shown when hovering over a parameter input field or the blue information icon.
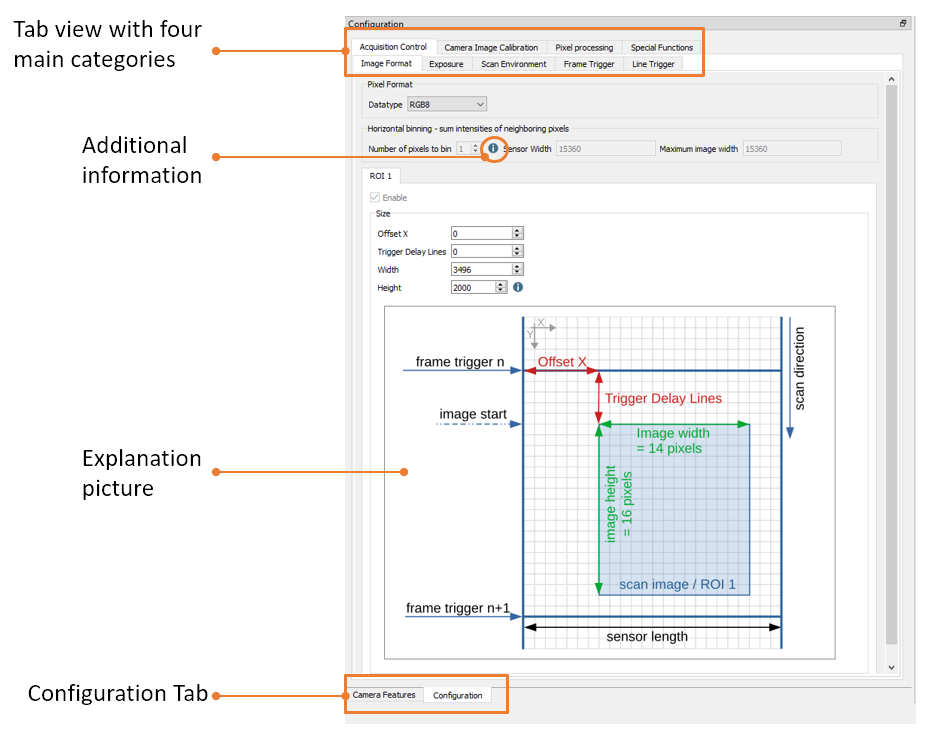
The Camera Features tab contains the GenIcam parameter tree, the user setup level, and an extra panel to set up the filter driver.
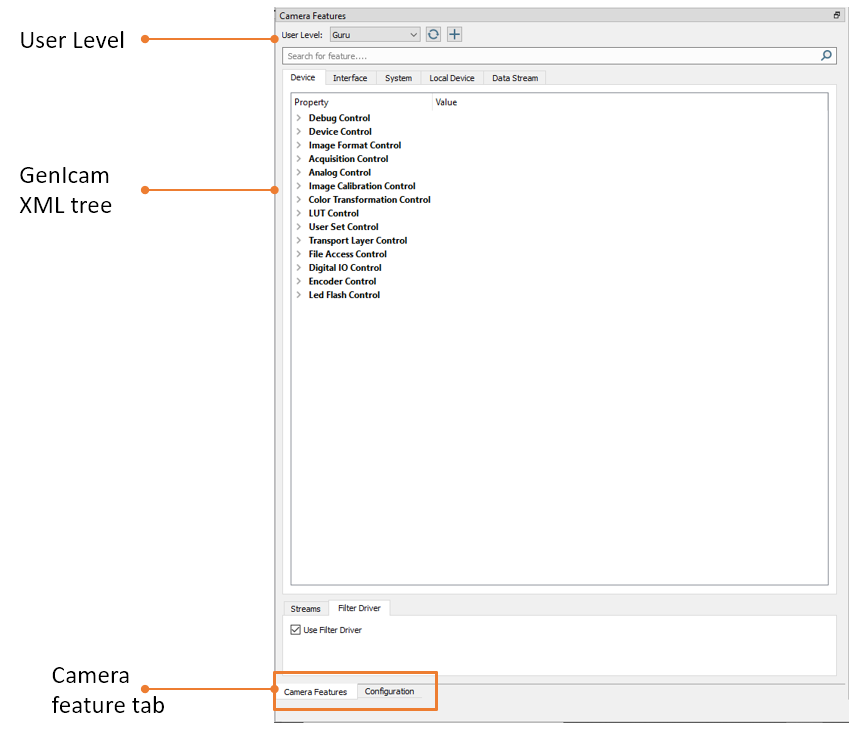
Image view widget
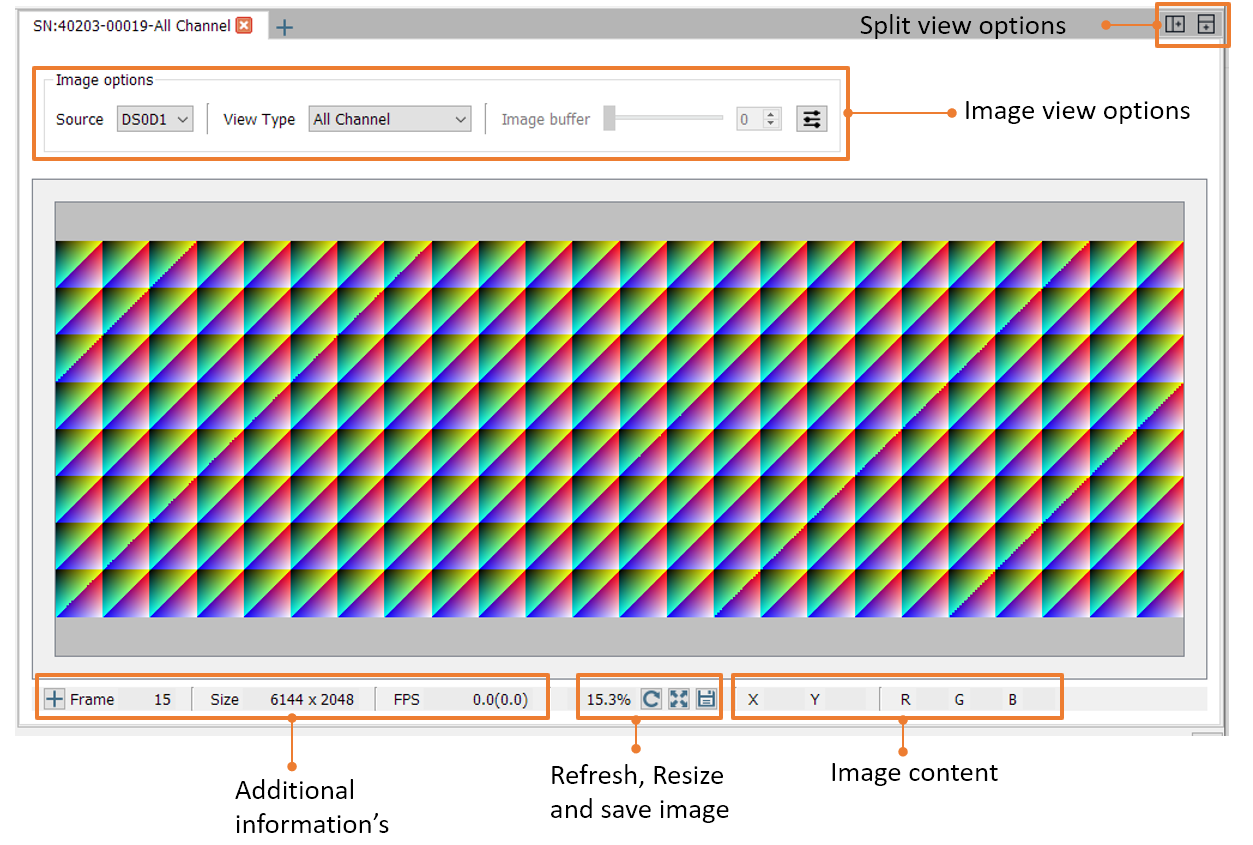
The image view widget shows the current image view and additional image and stream relevant information.
Split-view
The Split View option allows you to display multiple tabs side by side or on top of each other. As soon as two or more tabs are open you can select between the Horizontal Split-view and the Vertical Split view option.
.PNG)
To end the Split-view you can choose between Combine tabs to the immediate left tab-widget or Combine all tabs.
The following image shows an example of the Horizontal Split-view.
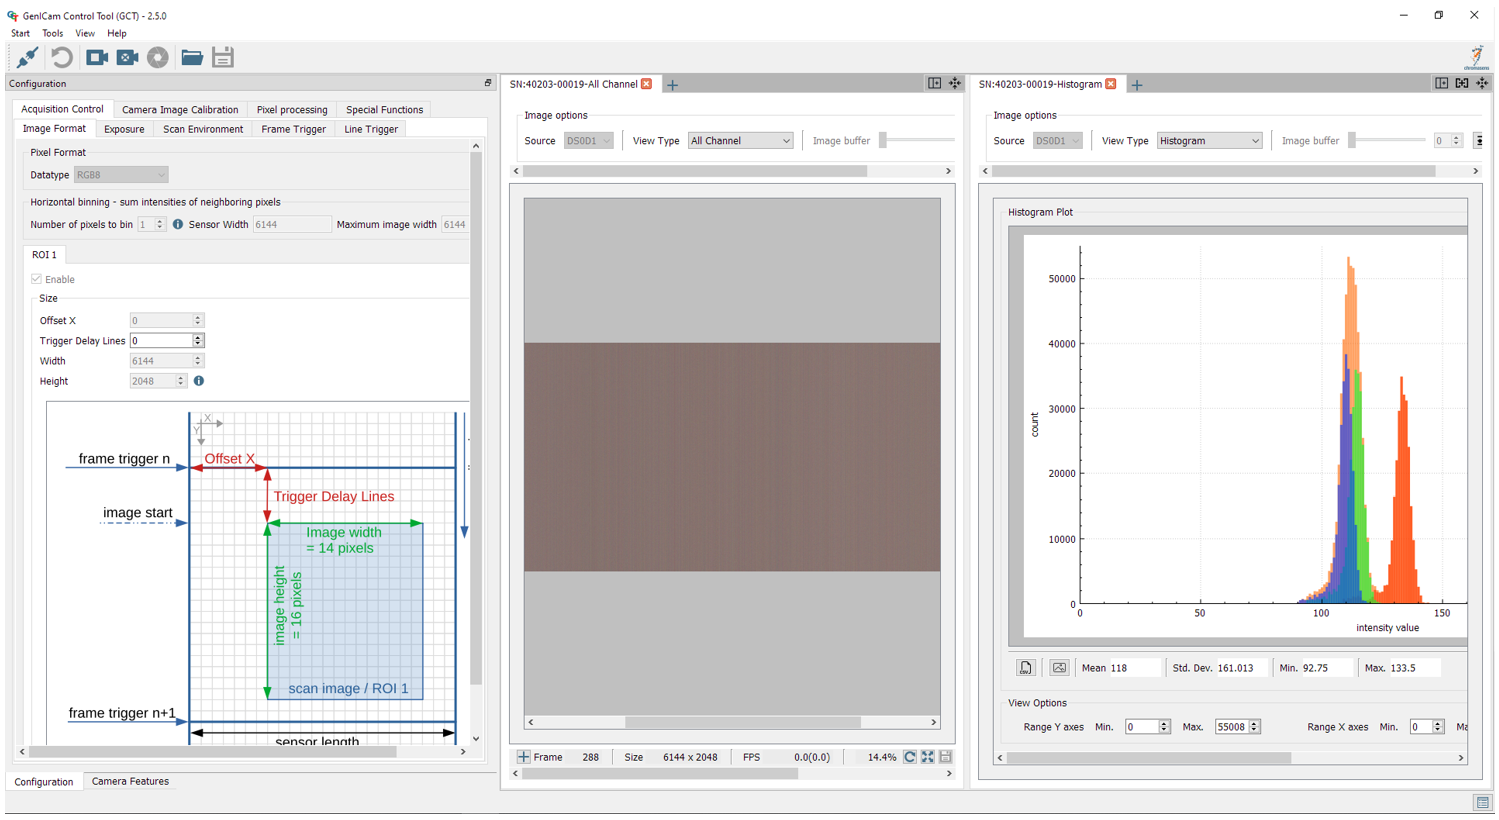
Image view options
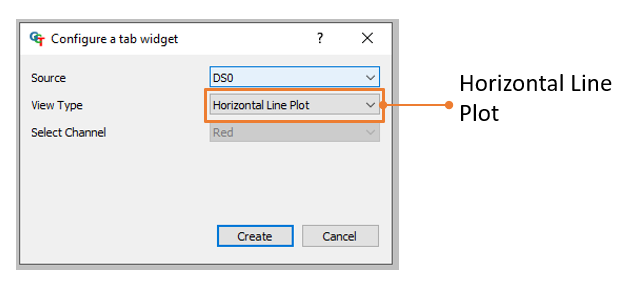
Line plot view
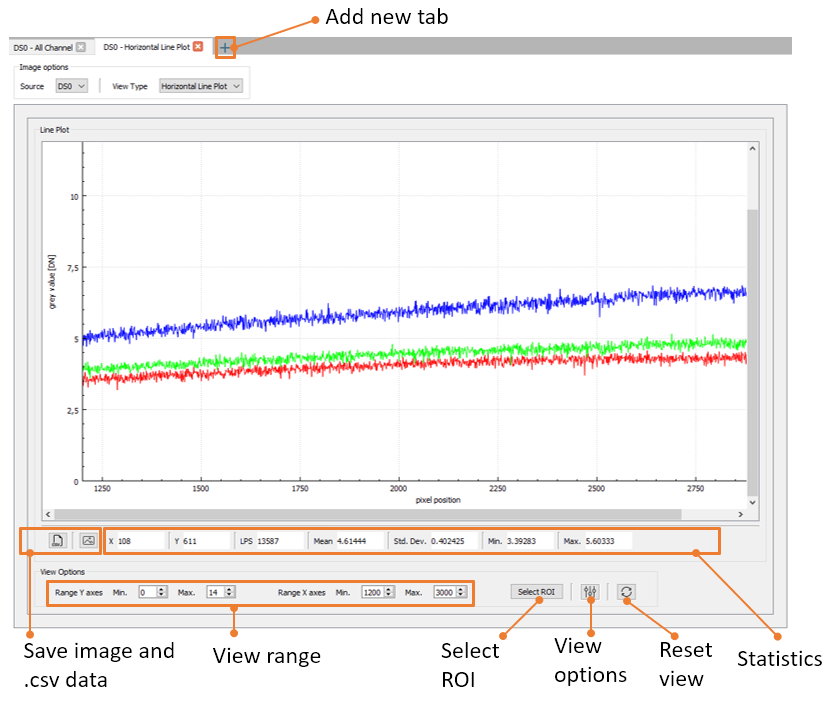
GCT can display a horizontal line plot in the image view widget. To add this feature, add a new tab, therefore press the plus on the top. A popup window will be open, please select under the “View Type” the “Horizontal Line plot.
After this configuration, a new window will open as shown in the following figure.
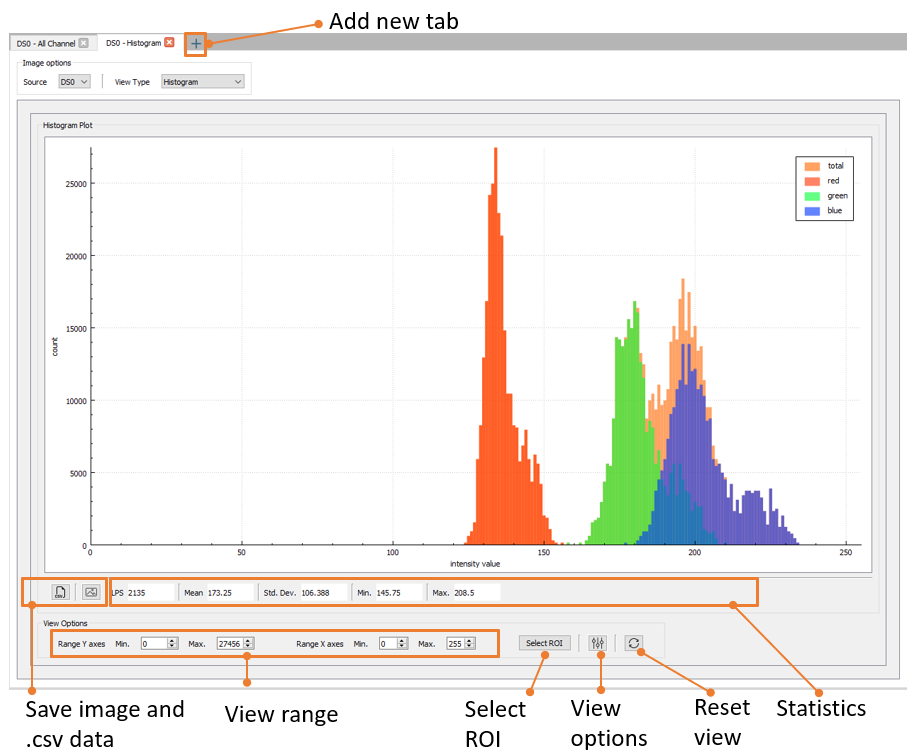
Histogram view
GCT can display a histogram of the image content in the image view widget. To add this feature, add a new tab, therefore press the plus on the top. A popup window will be open, please select under the “View Type” the “Horizontal Line plot.

After this configuration, a new window will open as shown in the following figure.
Single Channel
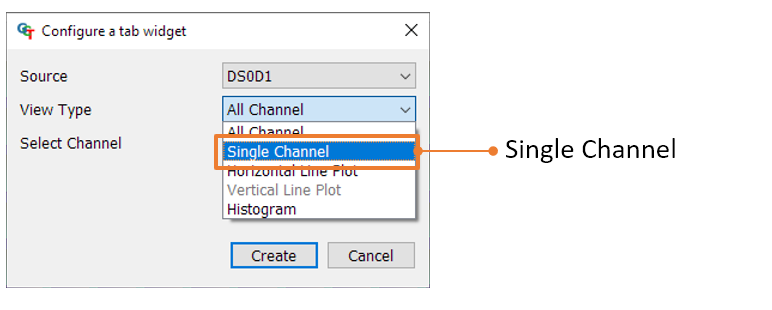
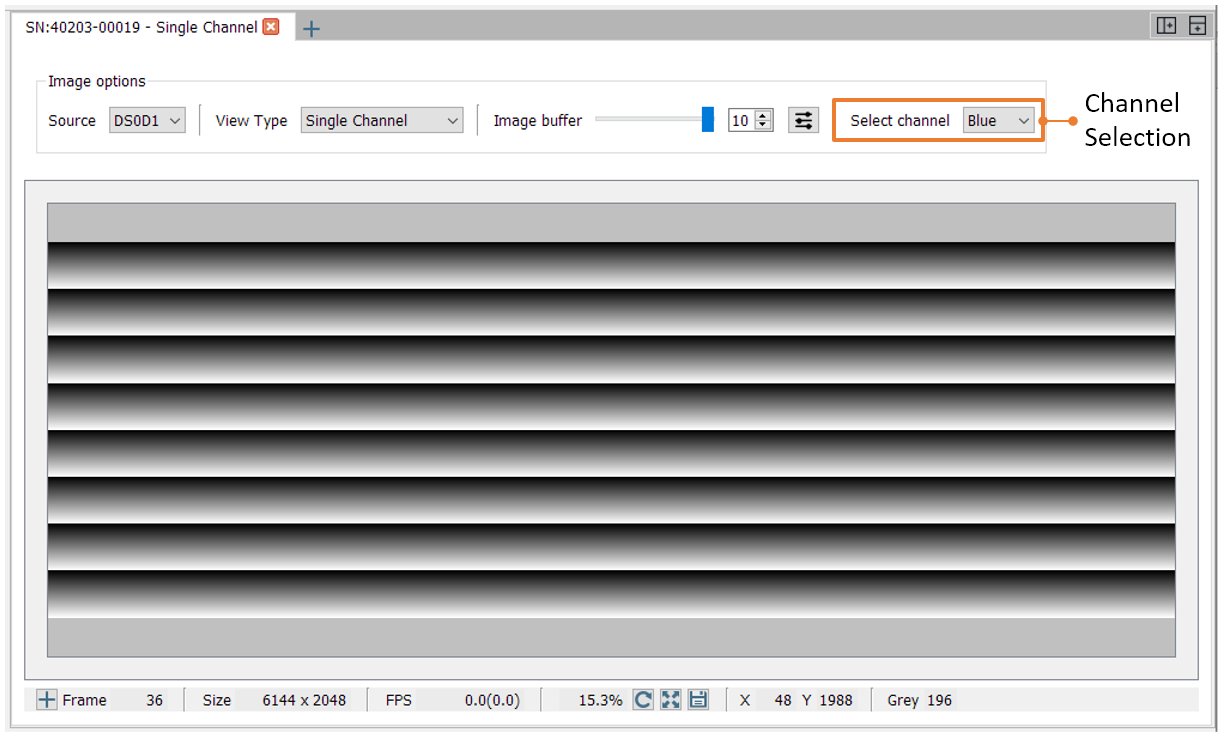
GCT can display only a Singel Channel of the image content in the image view widget. To add this feature, add a new tab, therefore press the plus on the top. A popup window will be open, please select under the “View Type” the Single Channel.
After this configuration, a new window will open as shown in the following figure.
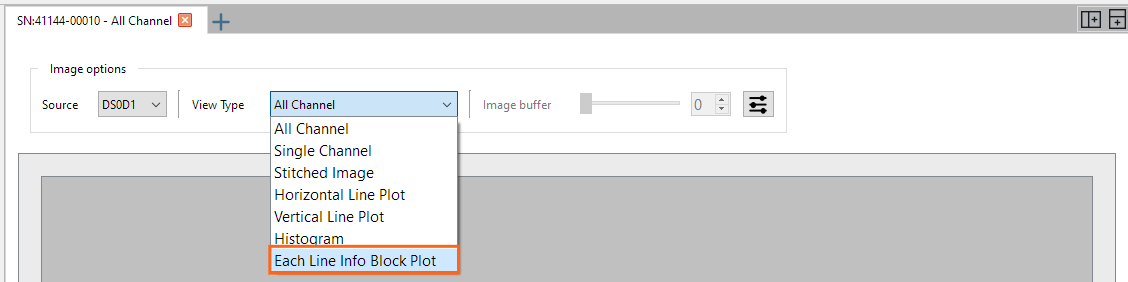
Each Line Info Block analyzer
With GCT you can analyze the Each Line Info Block of the image content in the image view widget. To add this feature, add a new tab, therefore press the plus on the top. A popup window will be open, please select under the “Each Line Info Block Plot” the Single Channel. Or you can change the View Type.
In this view, you can select four different plots. Therefore, navigate to Subview Type and select your feature of interest.
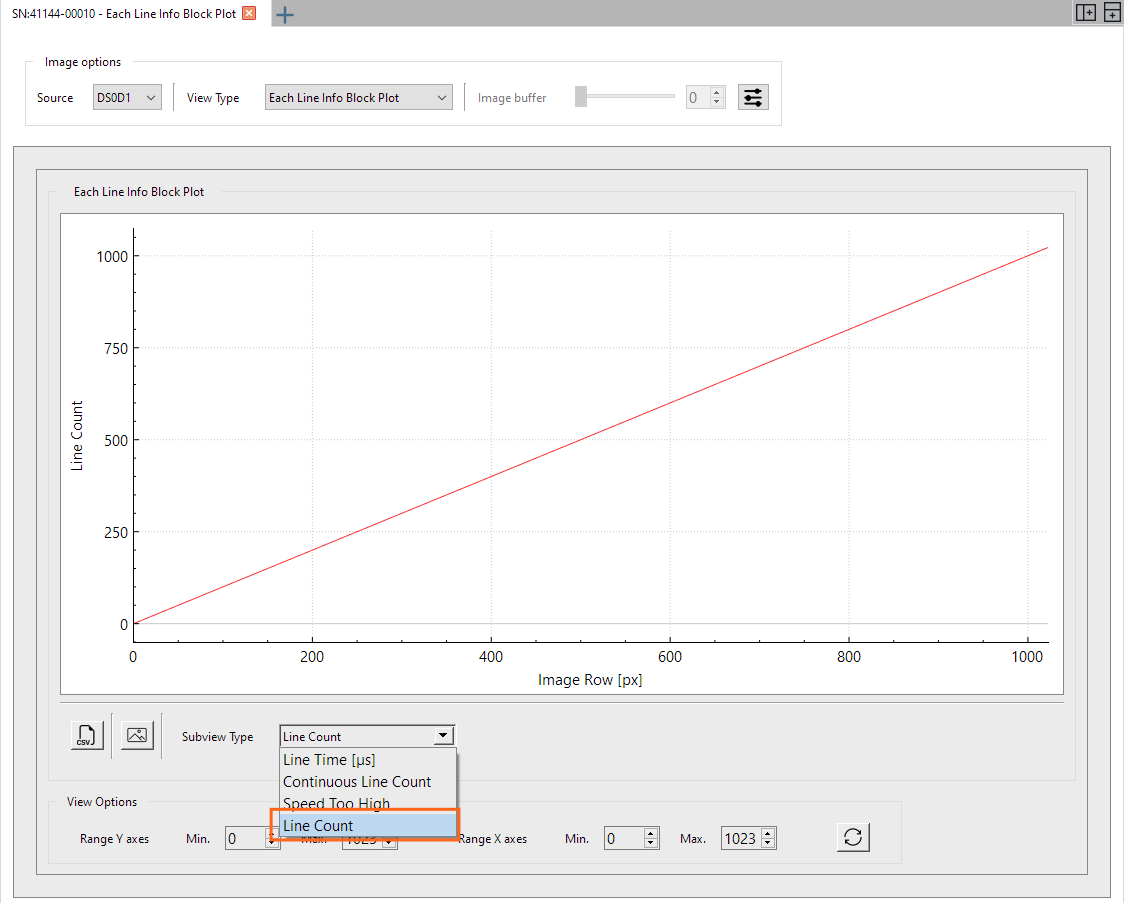
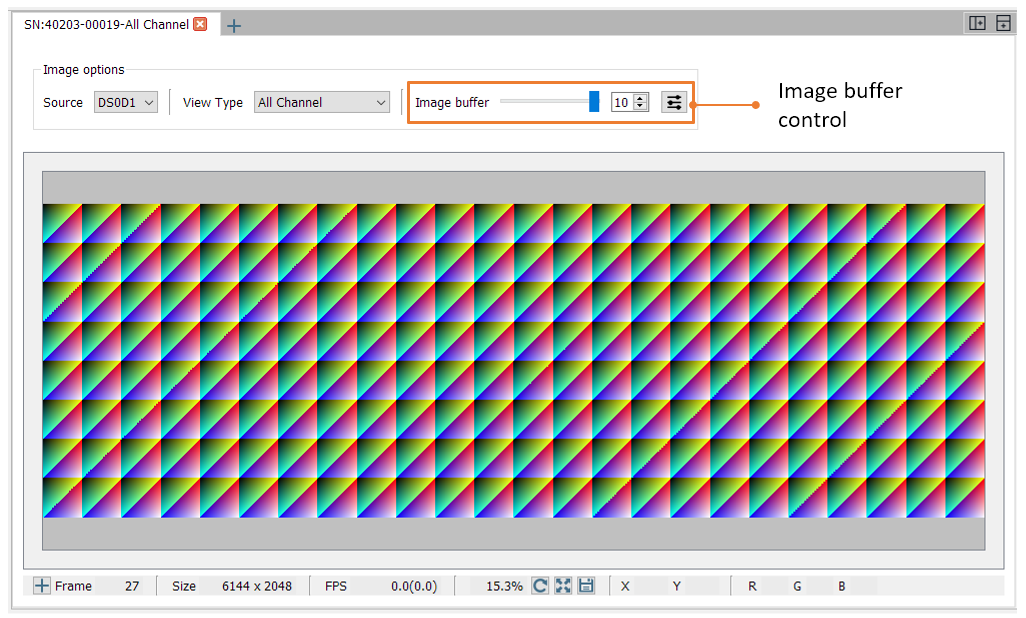
Image buffer
Multiple images can be buffered in GCT and displayed individually after stopping the acquisition. To enable this option, click on the right icon with the tree sliders. A new window will be opened check the Enable image buffer option.
Arrange / Rearrange widgets
The software provides different widget elements, they can be placed, resized, and docked freely within GCT window. If you are using two monitors you can place, for example, the configuration widget on the second screen and the image view widget on the first screen.

The software provides different widget elements, they can be placed, resized, and docked freely within GCT window. If you are using two monitors you can place, for example, the configuration widget on the second screen and the image view widget on the first screen.