For all evo cameras, passive and active cooling kits are available, which can be mounted to the back, upper, or lower side of the camera
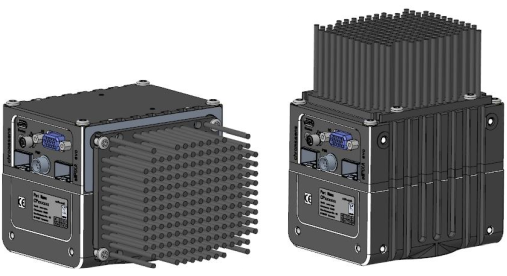 allPIXA evo with PIN Cooling
| Description | Identification Number |
| allPIXA evo PIN Cooling | CP000643 |
| allPIXA evo FAN Cooling | CP000644 |
| allPIXA evo Water Cooling | CP000651 |
Pin Cooling
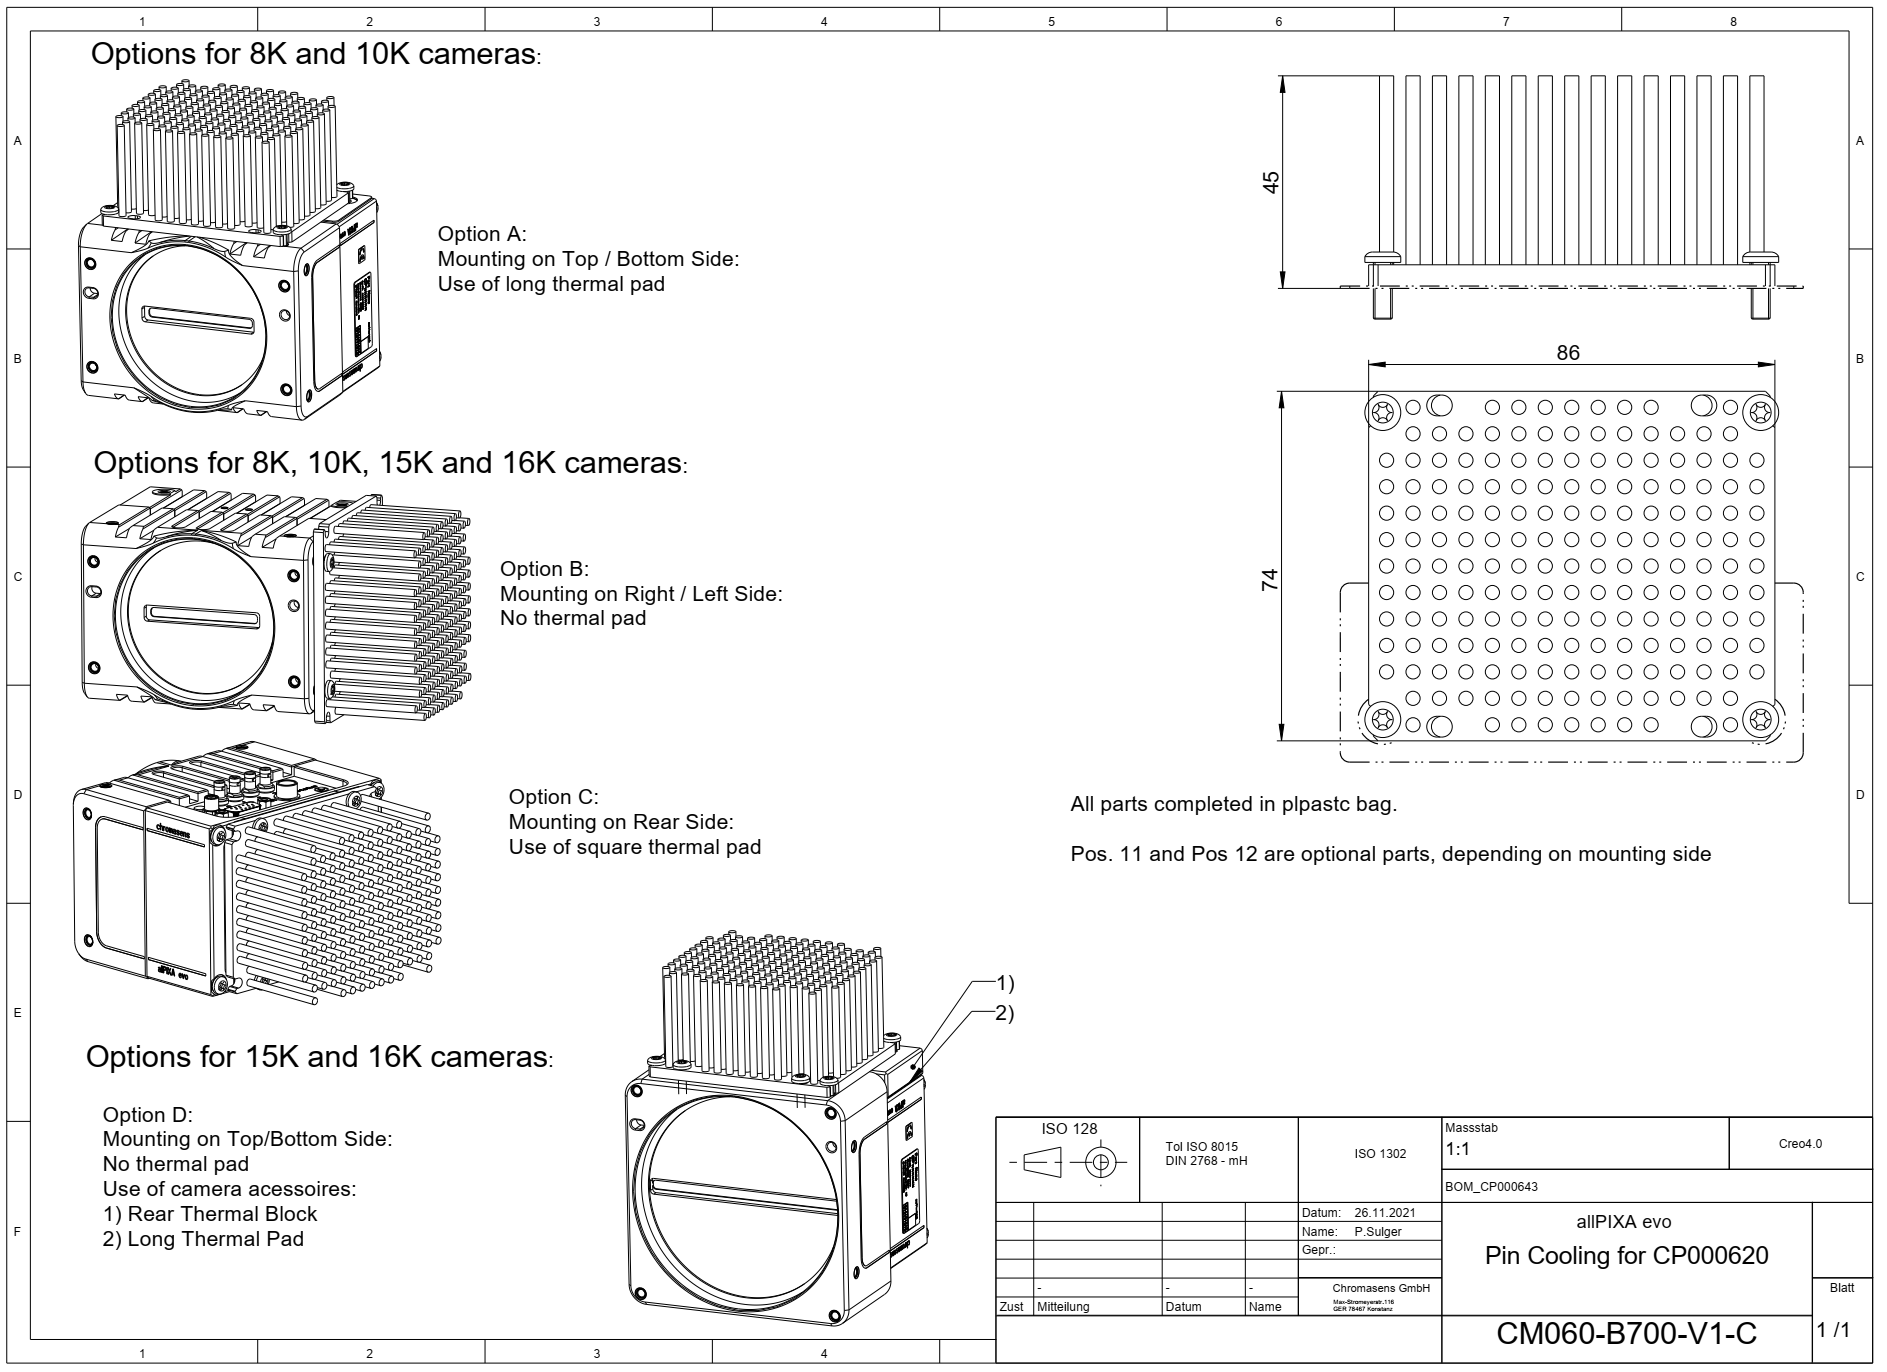
Download as pdf-file
Fan Cooling
Note
To start the fan you need to enable the Device Fan Enable flag, see the installation chapter.
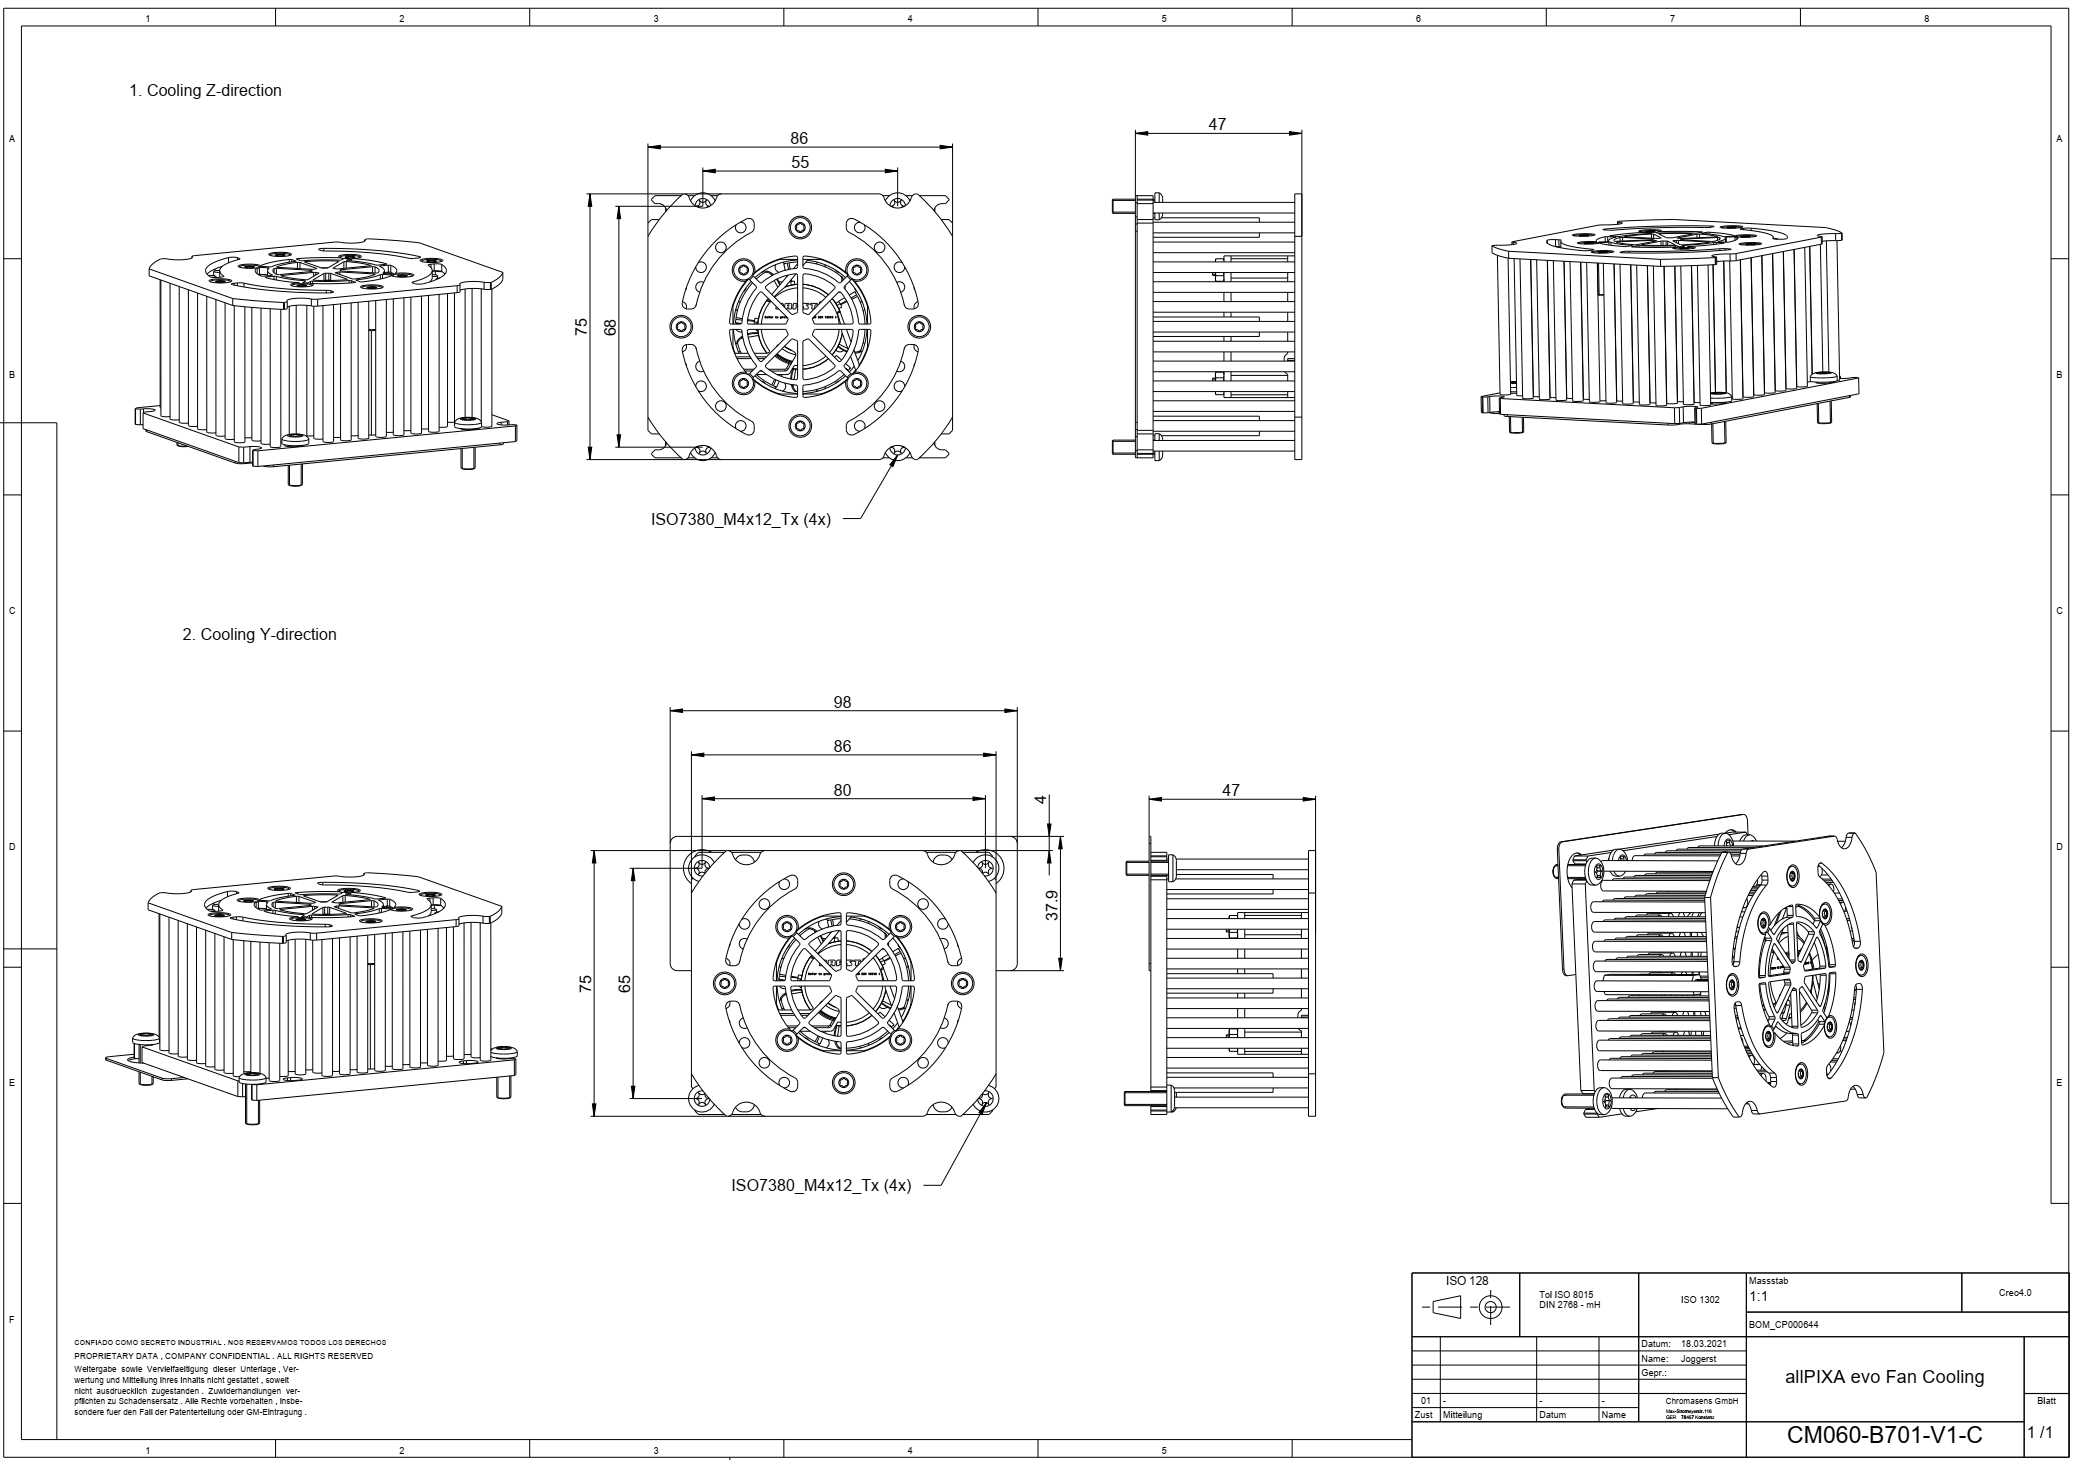
Download as pdf-file
Water Cooling
Note
For connecting the liquid heat sink we recommend a pipe 8 mm diameter inside and 10 mm outside diameter material PA-pipe.
For liquid, we recommend a water-glycol mixture with min-18% glycol to avoid algae in the liquid.
But check with the producer of the cooling system. Often, they need an additional additive to avoid corrosion in the system.
On tested cooling system is the following one: External cooling system AQ240-Pro - High Power | innovatek Webshop (webshop-innovatek.de)
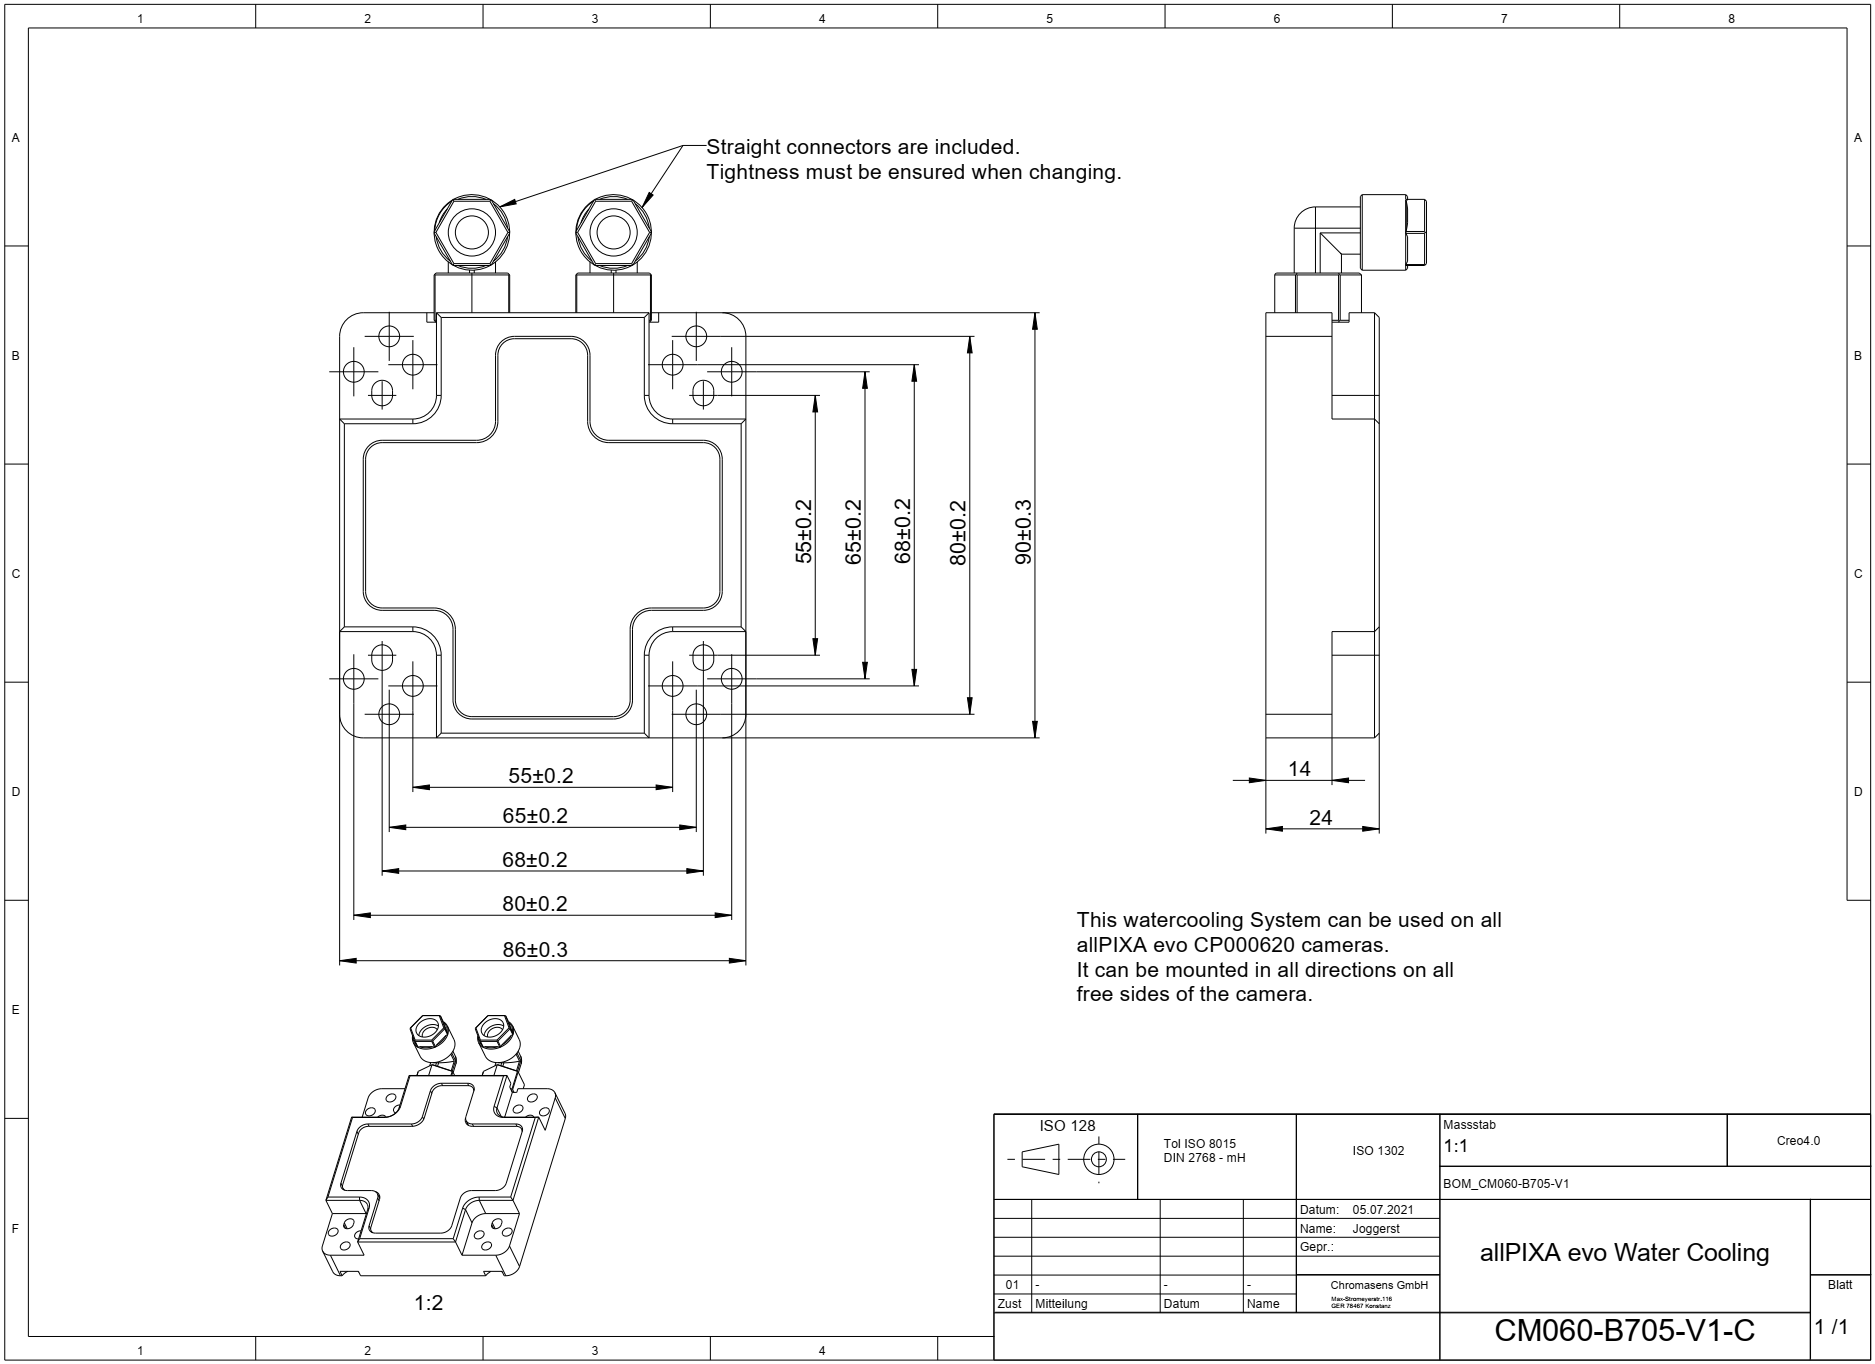
Download as pdf-file
Installation
- Place heat-conducting pads between the camera and the cooling adapter. Different pads are included, choose the pad which fits best to the camera side.
- Mount the cooling adapter.
- For fan cooling, connect the power supply cable with the camera's fan power supply connector.
- For fan cooling, enable the fan in your camera. Open the camera in GCT and navigate to the camera feature tree and set the parameter Device Fan Enable to true and save the setting.